

Developed and Distributed by Canzona Technologies


Photo Sieve Manual - Overview Window "Tags" Tab
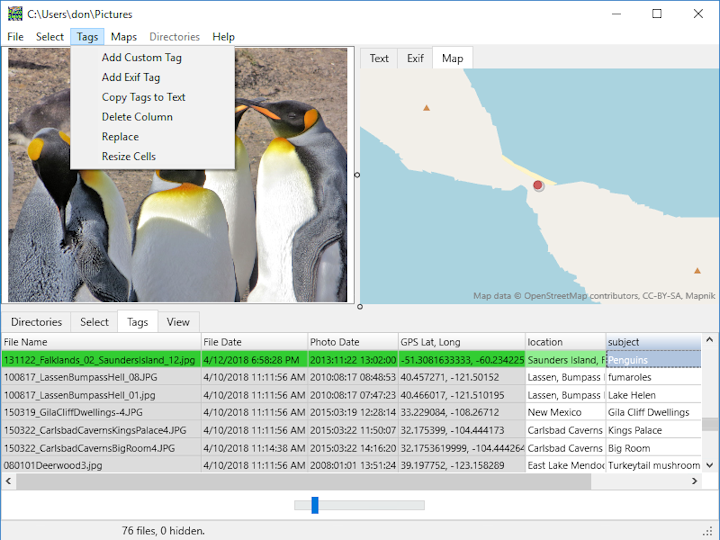
Left-clicking on a cell displays that picture as the active image. Ctrl-click selects that picture for further processing such as removing or hiding. Shift-click selects multiple images.
Left-click on a column title to drag that column to a new position.
Left-click on a column title to sort on that column. Shift/left-click does a secondary sort on a different column. Sorting by GPS positions sorts by distance from the picture in the upper left "Active Image" window.
Click the "Tags/Resize Cells" menu to automatically resize each column to the longest text in each column. The Zoom slider adjusts the row and column size.
Click the "Tags/Add Custom Tag" menu to add your own tag such as "location", "subject", or "family".
Click the "Tags/Copy Tags to Text" menu to copy selected tags to the Active Window "Text" tab. This gives you a head start creating text and helps when preparing a slide show.
Menu "Tags/Create Map Markers" adds map markers for the selected photos. Clicking the map marker selects and displays the photo.
Before clicking the "Tags/Add Exif Tag" menu, click an Exif tag such as "FocalLength" from the "Exif" tag in the upper right "Active Information" window.
Press ctrl-c to copy the contents of the selected cells. After selecting a cell, shift-click selects all cells between the previously selected cell and the current cell. Ctrl-click adds the current cell to the previously selected cells. Ctrl-v pastes to all selected cells in the column.